- Ai For Real Life
- Posts
- How To Use Higgsfield AI to Create Seamless Transitions Between Scenes
How To Use Higgsfield AI to Create Seamless Transitions Between Scenes
No timeline editing, no After Effects, just two images, two effects, and one prompt for cinematic flow.
Let’s skip the usual flythroughs for a second because what I’m about to show you is how to use Higgsfield AI to create smooth, cinematic transitions between scenes using just two images.
Most folks are using Higgsfield for cool FPV-style effects and camera motion. But what they’re missing is how powerful this tool is for connecting scenes with pro-level flow. No timeline editing, no After Effects, just clean AI movement and a well-placed prompt.
In this guide, I’ll show you exactly how I pulled off one of my favorite transitions step by step.
🛠️ What You’ll Need
A Higgsfield AI account
Two high-res screenshots:
One from the end of Scene A
One from the start of Scene B
A general idea of the motion you want between them
🔄 Step-by-Step: Create a Seamless Transition in Higgsfield AI

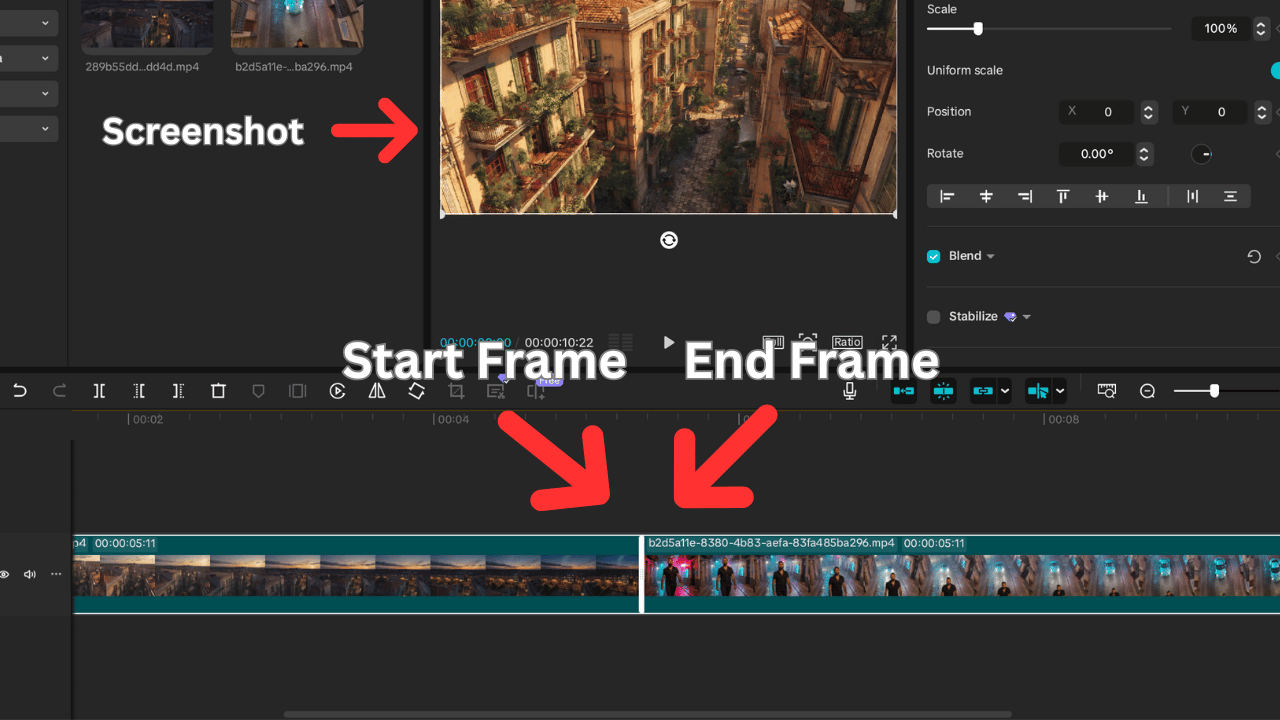
Step 1: Get Your Two Frames
Take a high-resolution screenshot of the last frame of your first scene. This is your starting image.
Then, grab a screenshot of the first frame of your next scene this becomes your ending image.
💡 These two images are your anchors -- the more stylistically consistent they are, the better the result.
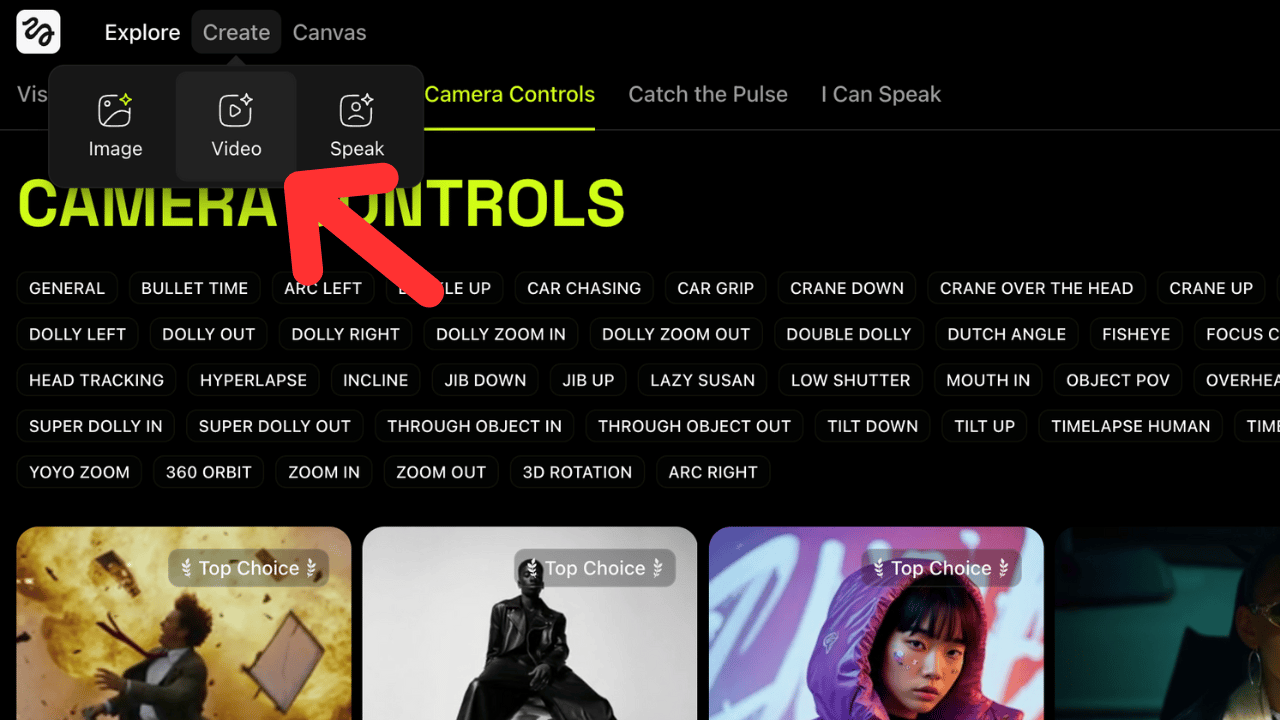
Step 2: Open Higgsfield > Create > Video

Go to Higgsfield.ai
Click Create, then select Video
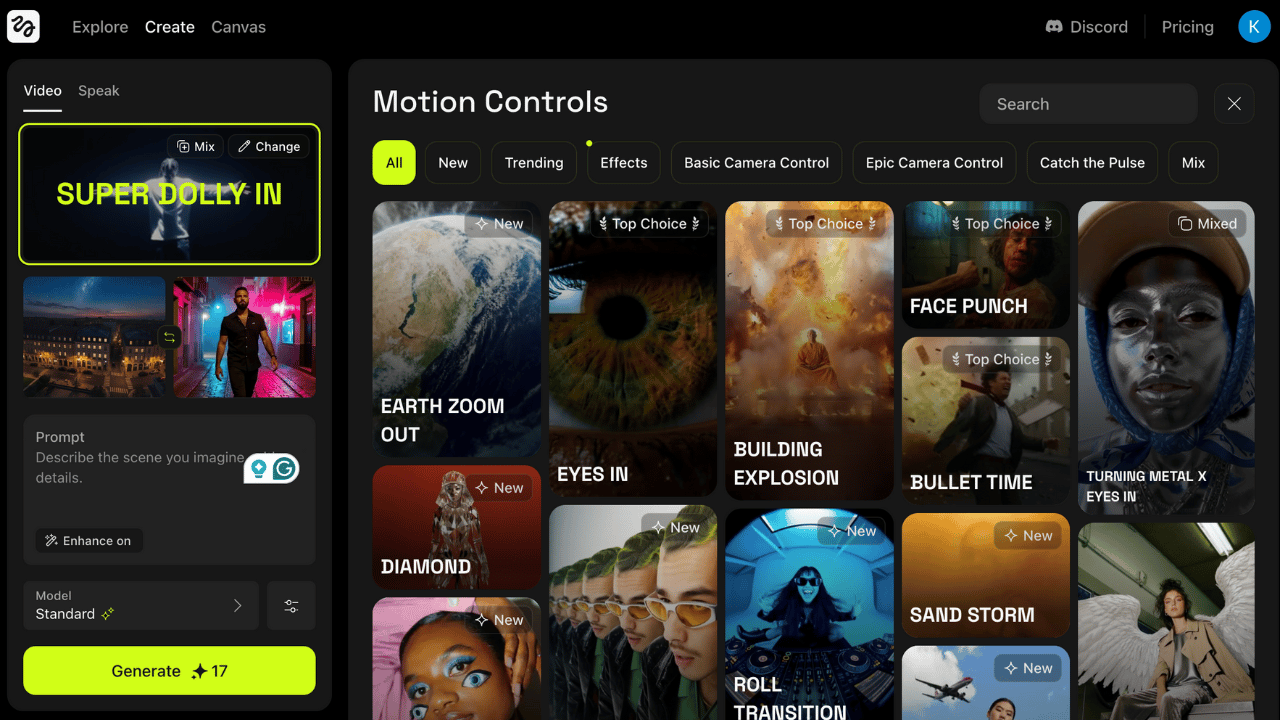
Upload your start frame image
Upload your end frame image
Step 3: Choose Your First Camera Move

Scroll through the camera styles and choose one that matches the feel of your transition.
👉 For example, I went from a high aerial shot to a street-level walking shot, so I picked Super Dolly In for that clean, cinematic push.
Step 4: Add a Second Effect with ‘Mix’

Click Mix to layer in another effect.
I used FPV Drone to get that buttery glide-through-the-city feel. It added motion and connected both frames naturally.
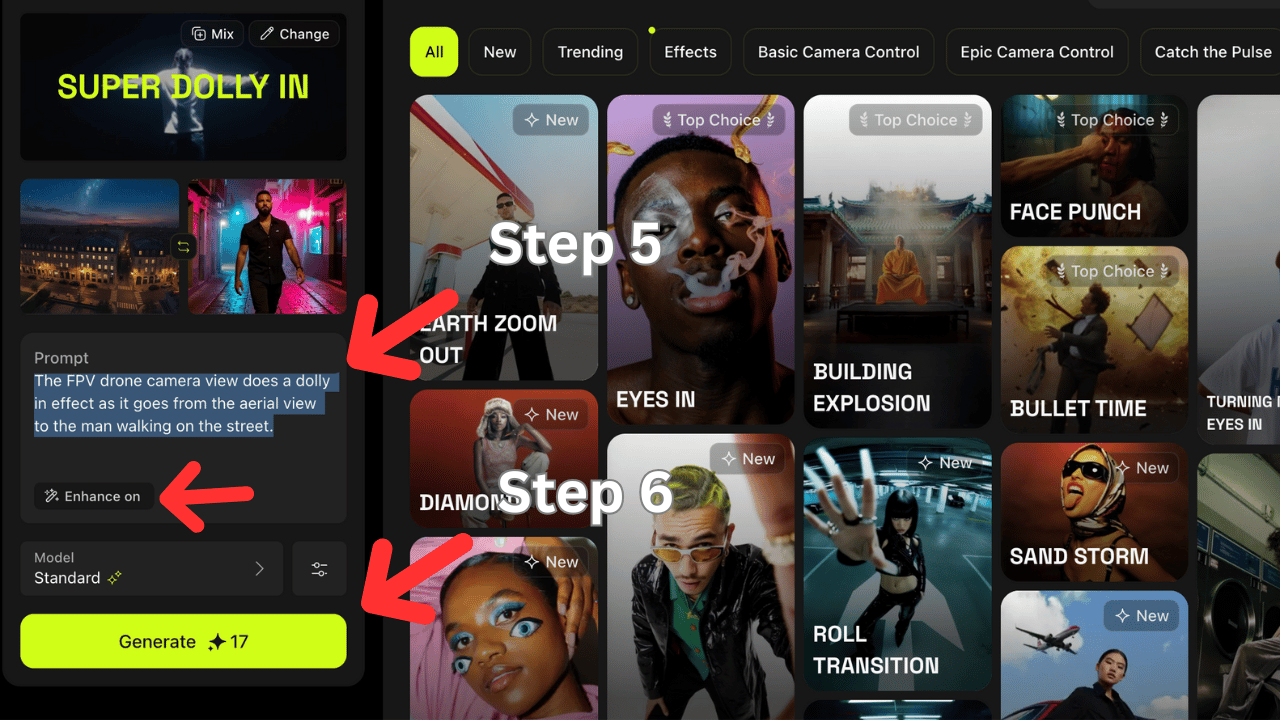
Step 5: Write a Simple Prompt
Don’t overthink it, just write a short line explaining what you want the camera to do.
📌 Example:
“The FPV drone camera view does a dolly in effect as it goes from the aerial view to the man walking on the street.”
✅ I also turned on the Enhance Prompt option to help the AI better interpret the intent.

Step 6: Hit Generate and Let It Cook
Click Generate and let Higgsfield do its thing.
In just a few minutes, you’ll have a smooth, AI-powered scene transition that looks like you spent hours in post.
🎬 Final Result: Smooth, Cinematic, and Easy
What I love about this method is how easy it is to test ideas, experiment with pacing, and build transitions that feel professionally edited, all without timeline stress or manual keyframes.
🎯 Quick Recap:
Upload two images: one from the end of your first scene, one from the start of your next scene.
Choose your first camera move (e.g., Super Dolly In).
Click 'Mix' to add a second effect (e.g., FPV Drone).
Write a simple prompt to guide the transition.
Hit Generate and let Higgsfield do its thing.
🧠 Pro Tips
Try pairing different camera moves like Zoom In + Pan Left, or FPV Drone + Rotate.
Keep lighting and color tones similar across both images for a more believable effect.
If the result feels off, swap the order of your effects or adjust your prompt.
Outro:
If this was helpful, bookmark it and come back to it when you're ready to build.
Got a favorite transition trick or an even better AI tool? Let me know, I’ll test it and maybe break it down in a future issue.
More breakdowns coming soon.
Stay curious, stay building, and I’ll catch you in the next one.
- Khalil
#AIForRealLife